How to Draw Flowers the Easy Way, Just for Your Enjoyment  This is an easy tutorial on How To Draw Flowers in six simple steps. Flowers look quite complex to draw with overlapping petals but they all have simple basic shapes. Almost all flowers can be drawn using an outline to define their shape. There are no sharp angles or straight lines
You will notice in all flowers and plants there are no sharp angles or acute shapes like a triangle or a square—but these shapes can be used mainly as a guideline when drawing flowers. When you draw flowers you will also have to note how their leaves are formed although it is not entirely necessary to have leaves as a support for the flower. Their shapes are basincall oval
Looking at most flowers from above, you will notice they mostly have a round shape but if you look at them from an angle you will see they are oval in shape. Look at these examples here. All petals stem from a central point in a flower—they grow outwards from this central point. To start, get yourself a #2 or #3 pencil and an eraser. Keep your pencil sharp all the time as this gives you crisp lines and a clean drawing. Sketch the guidelines lightly at first. When you sketch in the basic shapes like an oval or square you will need to erase these guidelines later. So let's start the drawing lesson with one of the easiest flowers to draw. We will create more complex flowers as we progress with these drawing lessons. There will be more tutorials on how to draw flowers ranging from roses, tulips, irises, sunflowers, lily, geranium and daffodils. Floral Childrens Bedding At Beyond Bedding we understand that bedding is more than just fabric and thread but a warm haven. How To Draw Flowers - Follow These Simple Steps 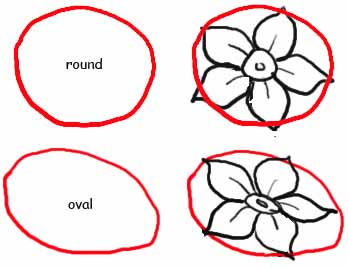 These are the very basic shapes you will find in any type of flower. Start off with a simple freehand drawing of an oval or a roundish shape as shown here. These are the very basic shapes you will find in any type of flower. Start off with a simple freehand drawing of an oval or a roundish shape as shown here. You can start off with a dot right in the middle of your oval. All shapes in your flower will go out from this dot.
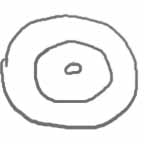 Step One
Draw a circle which will be used as a guideline only so it does not matter if it is not perfect. Then draw a tiny circle in the middle and another circle as shown here. When drawing, use a swift movement with your hand which will give you much better results and your drawing will look better.
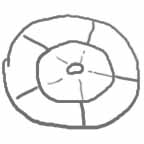 Step Two Step Two
Now you divide the circle into five parts as you can see in this drawing. It looks a little like a wheel but that is okay as these lines are only to guide you. Remember, everything goes outwards from this central point which applies to any type of flower. Notice also that most of these 'daisies' have only fice petals.
 Step Three
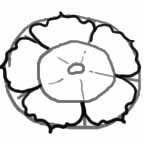
Now make a heavier (thicker) line and follow your guidelines. Make the outside part of the petal wavy and draw a small point to show the tip of the petal. Keep your pencil really sharp for a crisp, clean drawing and use a soft rubber to erase any lines
 Step Four
Now we are going to work on the circle in the middle. These are petals that curve over towards the middle of the flower. First draw a small line halfway between the outer petals these do not have to be exact, just approximately. See if you can get it similar to the drawing shown here.
 Step Five
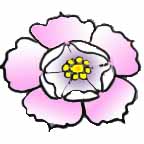
Now erase all the guidelines and your drawing should look something like this. You see, anyone can draw flowers if you follow these How To Draw Flowers in this series. It really is quite easy to do.
 Step Six
Now the fun part. Color your flower in with soft pastel shades, any color will do. Ask your family if they like it - I know they will! Follow along with more simple tutorials on this website. Most of them a pretty simple to do and of course it does take a little practice. See more pages here on how to draw flowers, these are tutotrials in very easy steps that anyone can draw.
| 


 These are the very basic shapes you will find in any type of flower. Start off with a simple freehand drawing of an oval or a roundish shape as shown here.
 Step Two


